
Fixing the Rear End, or Disaster was a Hard Right Away
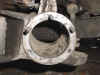
Ignoring a noise or a feeling can be really dangerous. The frame on the left above show whet the Drivers hub assembly looked like after a drive one day. The previous owner had started to work on it but then just buttoned it up. Leaving one of the studs out and loose studs in place.
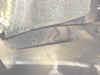
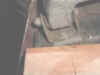
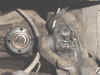
This turned a short winter project into a long and fairly interesting one. First some picture to show where the parts went (they aren't real clear but it was enough)
The hardest part in the job was getting the new bushings installed. I only ruined two until I found a way to get them in. The picture below is the tool I made up. It consists of some threaded rod, washers, and a piece of schedule 40 plastic pipe. This, some silicon spray, and a air driven ratchet ran them in quite nicely. The real concern was over how to tell when they were centered, that turned out to not be so much of a worry.
During the process of fixing the rear end I discovered that there is considerable flex in the frame/body. Supporting the car on blocks just in front of the trailing arm mounts was not enough. I ended up installing jackstands on the rear frame member just in back of the rear wheel opening.